This is a tutorial how you can create a simple web setup project for your asp.net application. We will also add a new wizard step into the msi setup wizard to allow user to choose which environment he is installing and the msi will deploy the appropriate web.config specific for that environment.
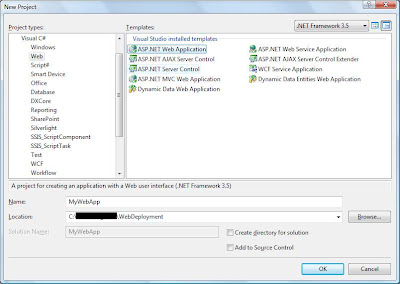
1. Create a new Web Application project in Visual Studio
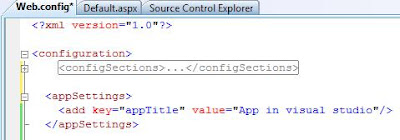
2. Insert the following appSetting into web.config
3. Copy paste the web.config 3 times and rename to the following file name:
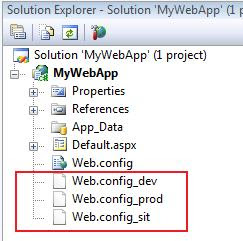
Each of the 3 files contain configuration that is specific to their environment(development, SIT and production). You can add more configuration to the config file depend on your application need. We will use these files in the web setup project later.
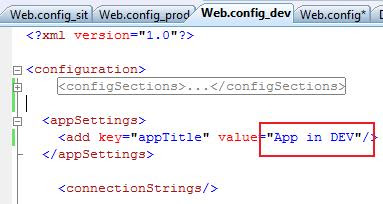
4. Update each of the new web.config to reflect its environment:
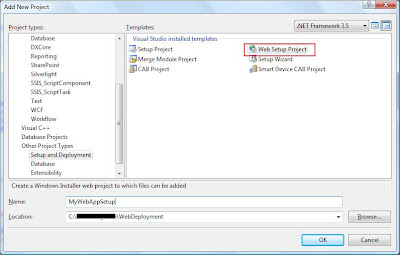
5. Add a new Web Setup Project into the solution.
After you add the Setup project,
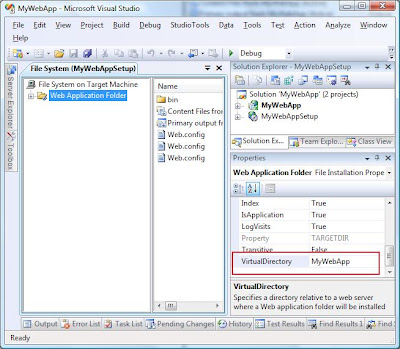
Select the Web Application Folder, in the property window, modify the virtual directory name. This is the default virtual directory name which will be installed into IIS. You can change this later during the installation. If you cannot see the Web Application Folder, select the Web Setup project, in visual studio menu, go to View -> Editor -> File System.
6. Right click in the Web Setup project and select Add -> Project output.
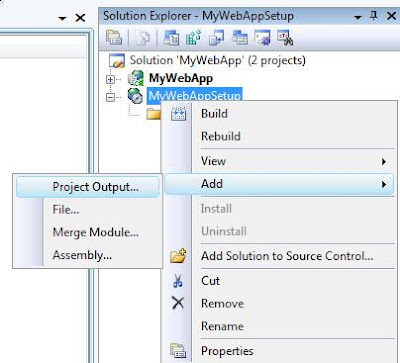
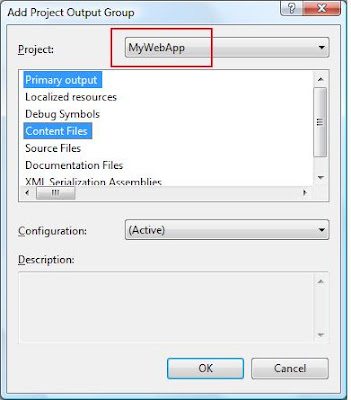
7. Make sure the web application in the current solution is selected, then select Primary Output and Content files. This will add the binaries and necessary files into the msi for installation.
8. Right click in the Web Setup project and select Add -> Files. Add the three environment specific web.config file into the setup project.
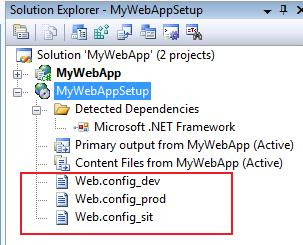
Now we will begin the steps to add a new dialog to our installer. This dialog will enable user to choose which environment he want to install and the installer will deploy the appropriate web.config file to the installed folder.
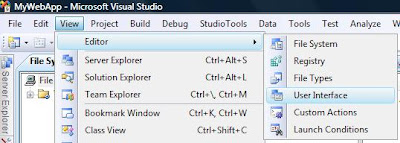
9. Make sure the Web Setup Project is selected. In the visual studio menu, go to View -> Editor -> User Interface. You will now see the list of dialogs which will be presented during the installation time.
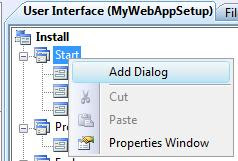
10. Right click on the Start node and select Add Dialog.
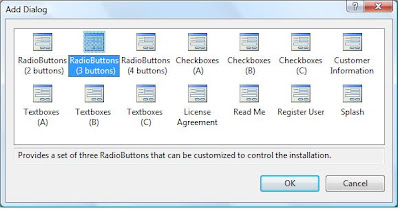
11. Select the Radio Buttons (3 buttons) dialog
12. Right click on the new dialog you just added and select Move Up. This is to re-order the sequence of dialog presentation during installation time.
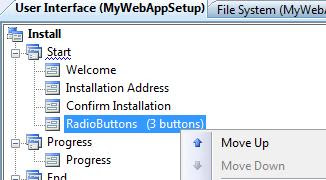
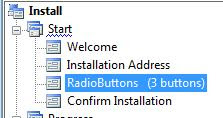
The dialog sequence should look like this after you complete the step.
13. Select the Radio Button dialog, and in the property window, modify the property value to match the following:
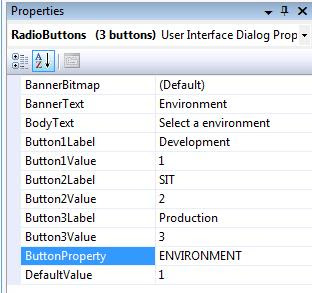
The value of the ButtonProperty is the name which will be used for lookup later. The value you specified for ButtonProperty is case sensitive. The ButtonValue is the value which will be set into the lookup name specified by te ButtonProperty. For example, if you select SIT, "2" will be assigned to ENVIRONMENT.
14. Now select the web.config_dev in the Web Setup project. In the property window, set the Condition and target name to match the following:
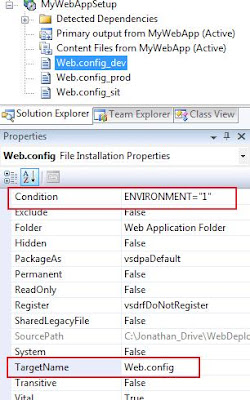
Repeat the same for web.config_sit (set the condition to ENVIRONMENT="2") and web.config_prod (set the condition to ENVIRONMENT="3")
If you specify a condition, the file will only be install if the condition is evaluated to true. The value for ENVIRONMENT is assigned in the Radion Button dialog depend on which radio button you select. Remember "ENVIRONMENT" is case sensitve. It has to match the ButtonProperty value which you specified in the Radio Button dialog.
The TargetName is the actual name for the file when it is copied into the installed folder. In this case, we want to rename it to web.config
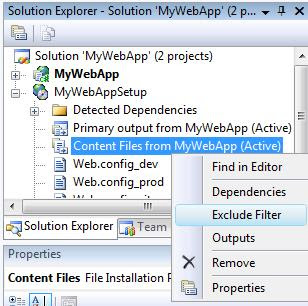
15. Next, we want to exclude the original web.config file from the web application project. The final web.config will be copied from either one of three environment specific web.confg file. In the Web Setup project, right click on the Content Files, select Exclude Filter.
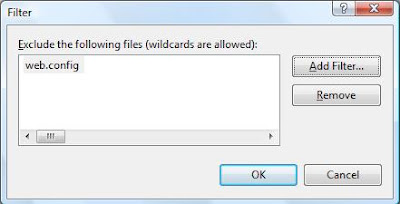
Add web.config to the filter dialog and click OK.
You can now build the installer and run the MSI to install your web application. Remember to run the MSI as administrator if you are in Vista and above.
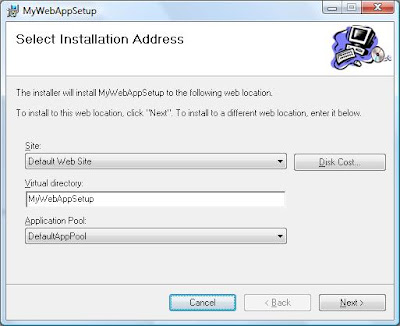
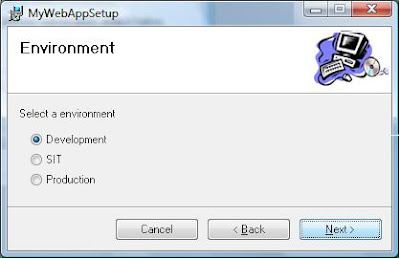
You will see the installer wizard dialog as following:
This is the standard dialog for web appliction.
This is the dialog which we add to allow user to choose the installation environment.
After the installation complete, you can open the web.config to verify the correct file for that environment has been installed.
Labels: aspnet, msi, visualstudio
